Whether you're looking to set up a new employee with a user, number, and device, or an IT consultant who needs access to the Voice Portal but doesn't need a phone number, it all starts with the touch of a button. This is the process to create a new end user on a Cloud PBX account.
Follow these steps to create a new user on an account with Cloud PBX:
- Go to Account > Cloud PBX > Users.
- Click [+ Add User] in the top right.
- Fill out the user's information as detailed below:
- User Information
- Voice Portal
- Calling Plans
- Number & Device
When you're done with all four sections, click [Create].
See also: Add User(BCC) and Platform Users.
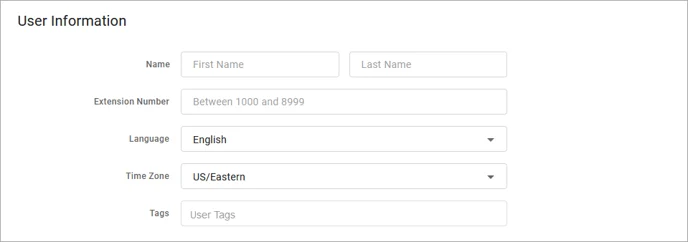
1. User Information
Enter the appropriate information in the fields provided.

| Code | Description |
|---|
| Name | Enter the user's first and last name. |
| Extension Number | Give them a unique extension number. |
| Language | Choose the language that will be used in the telephone user interface (TUI) audio prompts for star codes and the IVR: English or French. This is separate from the Language setting on the user's Voicemail box. |
| Time Zone | Select the user's time zone. |
Tags
| This is an optional mechanism to organize and search for users by one or more custom identifiers, such as department, location, or anything else. If it would be useful to search for this user by a particular term, enter it here. See also: User Tags |
2. Voice Portal
Not every user needs access to the Voice Portal, and we only need an email address for those who do. The new Voice Portal Access toggle will allow you to enable or disable online access for each user. The toggle is disabled for new users by default, so be sure to turn it on for those who need it.
- Disabled: The user will not have access to the Voice Portal, and the Email field is optional.
- Enabled: The user will have access to the Voice Portal, and the Email, Username, and End-User Role fields will be required.
See Voice Portal Access Toggle for details.

| Code | Description |
|---|
Voice Portal Access
| This toggle allows you to enable or disable access to the Voice Portal for this user. It's disabled by default, so flip it ON for those who need it and leave it OFF for those who don't. See also: Voice Portal Access Toggle |
| Block the welcome email | Once the user is created, an email with their Voice Portal login information will be sent to them. If you don't want to send this email right now, check the option to block the welcome email. See also: Block the Welcome Email |
| End-User Role | Choose the level of access this user will have in the Voice Portal. - Limited: Access to manage their own account features.
- Admin: Access to manage features for all account users.
|
| Username | Enter a username which they can use to log in to the Voice Portal. The username must be unique across all partitions and accounts. |
| Email | Enter the user's email address. This is where their login information will be sent. A valid and unique email address is required if the Voice Portal Access Toggle is enabled, but it's optional if the toggle is disabled. |
3. Calling Plans
Choose the user's calling plan from the drop-down menu.
See also: User Calling Plans

4. Number and Device
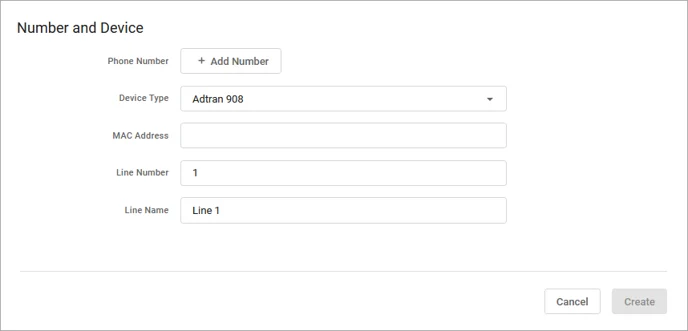
Click Add Number and Device (Optional) to assign a new phone number and device to this user. You can skip this step and add a device later, if needed.

| Code | Description |
|---|
| Phone Number | Click [+ Add Number], then fill out the required fields. See Add Phone Numbers for information about these fields. |
| Device Type | Select the make and model of the user's device. |
| MAC Address | Enter the device's MAC address. |
| Line Number | Enter the line number on the device to be activated for this user. |
| Line Name | Give the name a line, such as the user's name. |
SIP Credentials
| If needed, expand this field to add or generate a SIP username and password. |


